When it comes to maintaining your Kia Rio, especially models from 2002 to 2007, one crucial component that often requires attention is the ignition coil. This guide will help you understand the importance of the ignition coil, signs that it may need replacing, and a step-by-step guide on how to replace it.
What is an Ignition Coil?
The ignition coil is a vital component in your vehicle’s ignition system. Its primary function is to transform the battery’s low voltage (12 volts) into the high voltage needed to ignite the air-fuel mixture in the engine’s combustion chamber. This high voltage is crucial for the engine to start and run smoothly.
Signs of a Faulty Ignition Coil
A malfunctioning ignition coil can lead to various engine performance issues. Here are some common signs that your ignition coil may need replacement:
- Engine Misfires: If you notice your engine hesitating or stuttering, it could be due to a failing ignition coil.
- Poor Acceleration: A drop in acceleration power might indicate that the ignition coil is not providing the necessary spark.
- Check Engine Light: A faulty ignition coil often triggers the check engine light. Use an OBD-II scanner to check for specific error codes.
- Hard Starts: Difficulty starting your vehicle may be related to a bad ignition coil.
- Decreased Fuel Efficiency: An inefficient ignition coil can cause poor fuel combustion, leading to reduced fuel economy.
Replacing the Ignition Coil: Tools and Materials Needed
Before starting the replacement process, make sure you have the following tools and materials:
- New ignition coil(s)
- Socket wrench set
- Screwdrivers
- Ratchet and socket set
- Torque wrench (optional, for precise tightening)
Step-by-Step Guide to Replacing the Ignition Coil
- Safety First: Ensure the engine is off and cool before beginning. Disconnect the negative battery terminal to prevent any electrical shorts or shocks.
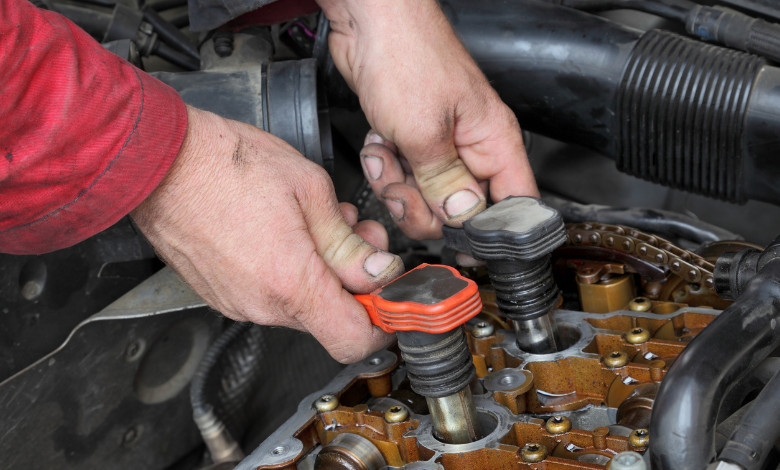
- Locate the Ignition Coil: In the Kia Rio (2002-2007), the ignition coils are typically mounted on top of the engine near the spark plugs. They are cylindrical and connected to the spark plugs by wires.
- Remove the Engine Cover (if applicable): Some models may have an engine cover that needs to be removed to access the ignition coils. Use a socket wrench to remove any bolts holding the cover in place.
- Disconnect the Ignition Coil Wires: Gently pull the connector plugs from the ignition coils. Be careful not to damage the connectors or wires.
- Unbolt the Ignition Coil: Use a socket wrench to remove the bolts securing the ignition coil to the engine. Carefully lift the ignition coil out of its mounting position.
- Install the New Ignition Coil: Place the new ignition coil into the mounting position and secure it with bolts. Ensure it is properly seated and aligned.
- Reconnect the Ignition Coil Wires: Attach the connector plugs to the new ignition coil. Make sure they click into place securely.
- Replace the Engine Cover (if applicable): Reinstall the engine cover and secure it with bolts.
- Reconnect the Battery: Reattach the negative battery terminal and ensure it is tightly secured.
- Test the Vehicle: Start the engine and check for any issues. The engine should run smoothly without misfires or hesitation.
Conclusion
Replacing the ignition coil in your Kia Rio (2002-2007) is a relatively straightforward task that can significantly improve engine performance and reliability. By following this guide, you can ensure that your vehicle’s ignition system functions correctly, leading to a smoother driving experience and potentially avoiding more serious engine issues. If you’re unsure about performing this replacement yourself, consult a professional mechanic for assistance.